Quick and Easy Application Steps for Bindy’s UV Gels
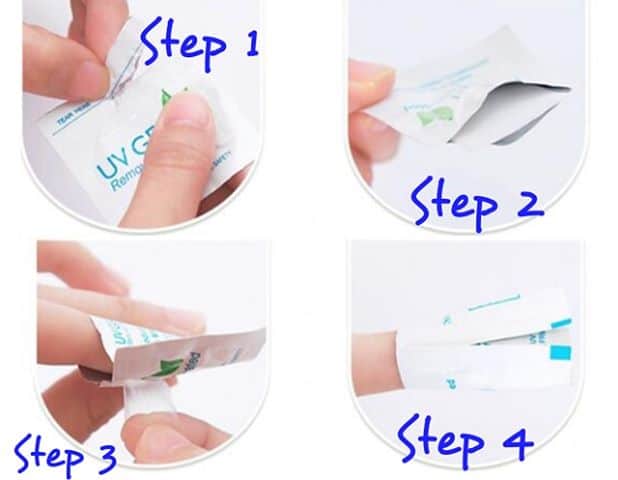
Step 1
Prepare the nail, file and buff well and including the corners of the nails. Buffing will help remove any oils from the nail surface and your nail should be nice and smooth before application.
Step 2
Clean and wipe your nail with an alcohol wipe or a nail pre-solution and let dry before applying the UV gel.
Step 3
Before applying, gently roll the bottle between the palms of your hands. Don’t shake your bottle heavily as this can produce air bubbles.
Step 4
Apply a thin coat of the base coat and apply over the nail tips to make sure you avoid getting any of your cuticle or skin, as this can cause it to peel and not stay on .
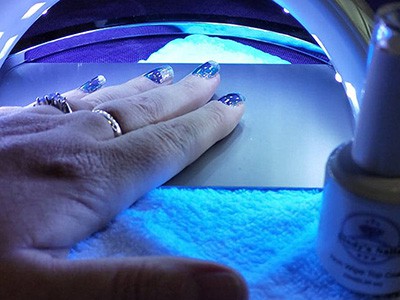
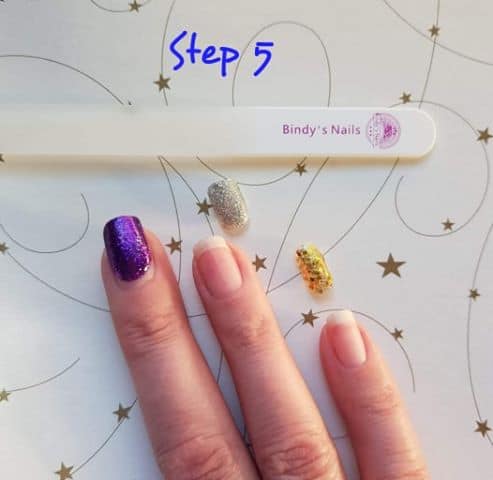
Step 5
Cure for 30 to 60 seconds depending on the wattage of your lamp (UV or LED lamp) and the lamp will switch off automatically.
Step 6
Apply the selected colour gel and do the same as steps 3 through to 5.
Step 7
If you wish to apply more coats, follow steps 3 through to 5.
Step 8
Apply Bindy’s Non wipe top coat, and follow steps 3 to 4.
Step 9
Cure under UV lamp or Led Lamp for 60 seconds.
Step 10
Make sure that you don’t leave your bottle open and keep out of direct sunlight.